Pages

Showing posts with label Vogue 8877. Show all posts

Sunday, December 22, 2013

Hack-o-rama (Vogue 8877): Part two

(Continued from previous post)

 Making the top a size smaller did mean that there is a wrinkle/fold that occurs at times under my armpit pointing to my bust point (aka nipple). 
Maybe making it a size bigger would have eliminated this or perhaps it's a characteristic of woven dolman sleeves?? To be honest I'm not sure, but I'm guessing in a fitted style top bust darts would have sorted this out.
Hacking back the sleeve length created the new problem of the entire side of my bra being seen when I raise my arm(s). I didn't think about it at the time but maybe if I had made the sleeve opening a bit narrower it might have helped avoid this gaposis.

Luckily this problem was pretty easily solved by wearing a singlet underneath. I was thinking of making a bandeau out of skin tone fabric to enable me to wear this top in summer but I have found (after the first wearing) that the blue/white print has all the breathability of a shower curtain, so it will be moved to the sping/autumn/winter wear pile. No problems about wearing it with a singlet then!

Another issue I have with the pattern is the stated suitable fabrics:
Not the actual fabrics themselves... but the fact that they don't suggest what is best to use where. 
After making this first top up - and this is purely my personal opinion- I think you would have much better results with a woven fabric for the yoke and a stretch knit below. This - I imagine- would give you a lot more range of movement with the dolman sleeve style of cut and maybe look more flattering/less wrinkly in general.

I finished all the armhole, neckhole and hem edges with self made bias binding from the blue/white print fabric.
On making the bias binding: please note, this synthetic fabric was VERY slinky. Originally I planned to make the bias binding using my new whiz-bang super-dooper bias binding machine, but such was the "slink" factor of the fabric that the strips distorted to 3/4 of the original width and were unable to be folded by the machine. 
If I use a fabric like this again I will know to cut it a bit wider to accomodate this distortation.

I ended up just folding the long fabric strip in two, ironing it and kind of fussing/fadangling it into proper  place while stitching and turning it as a  facing. This ended up being a rather labourous task over several nights (my sewing time is rather limited) but I took it slow and steady, using lots of pins and stopping when I felt too tired. 
In hindsight I'm glad I did this, I think a nice bias binding facing gives a lovely finish to garments and not rushing it enables a more "polished" finish.

So overall how do I feel about this pattern? A little bit let down (I have pretty high expectations for the "Very easy Vogue" line) and a bit unsure if I will make it again. I don't mind my finished top at all, the more I wear it the more I like it.  It's easy and uncomplicated to wear and I think in a different fabric combination it might be a bit more "user friendly" and workable in my wardrobe.
 But (like always) there are so many other patterns waiting a turn in my stash and that I would love to have a go at, so who knows what might end up on the cutting table next...

Til then

Happy Sewing!!!

Kate :)


https://blogger.googleusercontent.com/img/b/R29vZ2xl/AVvXsEi0uWxJ2JTtfj3J-EtMePaHfRbUI_ViK5T6ICWLVyP9ZqnZd_Eoxzr0Hxvx2tO-wkhzI3GSiny85H0S6KzA1HPai20p5kSd41mbqWAKy3m6YWMVZesGfFIs5jJWDcdwjuXX79ourqqAr5k/s1600/SAM_0273-705625.JPG

Hack-o-rama (Vogue 8877): Part One

https://blogger.googleusercontent.com/img/b/R29vZ2xl/AVvXsEgPuXGkaLoxkIkiCkaBQhkEFjrUiCncHkYkb7x2YLdimwsIQ7cESIDZYENBb5zJg0zkQxbdnwesRuBz8IEIKnl-cC7JgQ-MeQeefftk6NeN5KSKzFt-KPaQvyTtltOMj2Eog_7bPeRWBRg/s1600/SAM_0274-723306.JPG
I almost called this post "dudded", because that's how I felt after I first tried my original version of this top on. 

You see I made the fatal mistake of thinking that my top would turn out looking like the pattern illustration; loose but not overly baggy, a kind of woven spliced tee. 

https://blogger.googleusercontent.com/img/b/R29vZ2xl/AVvXsEi0uWxJ2JTtfj3J-EtMePaHfRbUI_ViK5T6ICWLVyP9ZqnZd_Eoxzr0Hxvx2tO-wkhzI3GSiny85H0S6KzA1HPai20p5kSd41mbqWAKy3m6YWMVZesGfFIs5jJWDcdwjuXX79ourqqAr5k/s1600/SAM_0273-705625.JPG
(Now funnily enough I've just read this post by Gertie explaining pattern illustrations vs reality ,in her case with regards to vintage patterns, but I think it's pretty much still true today). 

What I got was a baggy top with MUCH longer than expected sleeves (please note I made view "A").
Now in hindsight (and after trying it on for the first time) I realised that a woven dolman sleeve top with no fastenings whatsoever was going to need to have a fair bit of ease to be able to get it on/off and actually move around in it! Also the fact that there were no darts anywhere suggested that it wouldn't have much shape. 
Duh. Yeah it was one of those "lightbulb" moments when I finally figured this ;P
But the sleeves,oh the sleeves!
On the illustration (yep there I went again taking a pattern drawing to be absolute gospel) they looked to end halfway between shoulder and elbow....
But in reality they were much closer to actual elbow length (more like view "B").

Now I'm 5ft 9", so not short by any definition, but I still had to hack off at least 2 inches to get the top to look somewhat more like what I was expecting. This was done progressively by trying it on then trimming a bit off each time until I got the sleeves where I wanted. I actually changed the angle of the sleeve end as well during the trimming, making it a more "steeper" angle than the original, as that's what looked better to my (amateur) eye.
To tell the truth by this stage of the project I thought the whole thing was going to be a total wadder and was desperate to try and save it in any way. I was so miffed at having used my lovely blue and white fabric (that had been gifted to me by a friend) that I was pretty brutal with the roller cutter. 
It could have very easily gone quite badly...or at least have turned into a sleeveless tank top ;)

The original sleeves were also much wider than expected. I felt like someone wearing one of those costumes where the sleeves are made from aircon vent tubes (never seen one? I did try to find you a picture, lets just say when you google "foil" "costume" and "man" some pretty strange things come up!), they felt that weird and billowy. 
Again I realised that with a dolman sleeve they would have to be pretty wide, otherwise you would never be able to raise your arms. Hindsight is a smug so-and-so some days.
 I made this top one size below what the size guide recommended (I did check the finished garment measurements first to make sure they were bigger than my own bust and waist) and can only imagine how much looser it would have been if I have made it in my "proper" size.

To be continued....


Friday, November 8, 2013

Only one more sleep ...

I'm currently tidying up some much neglected computer/blogging related chores so that I can be ready for my Perth Burdastyle Sewing Club weekend away. This is my third sewing weekend and I am looking forward to it greatly :D Good food (AND not cooked by me!), two full nights sleep and lots of sewing time- what's not to like?

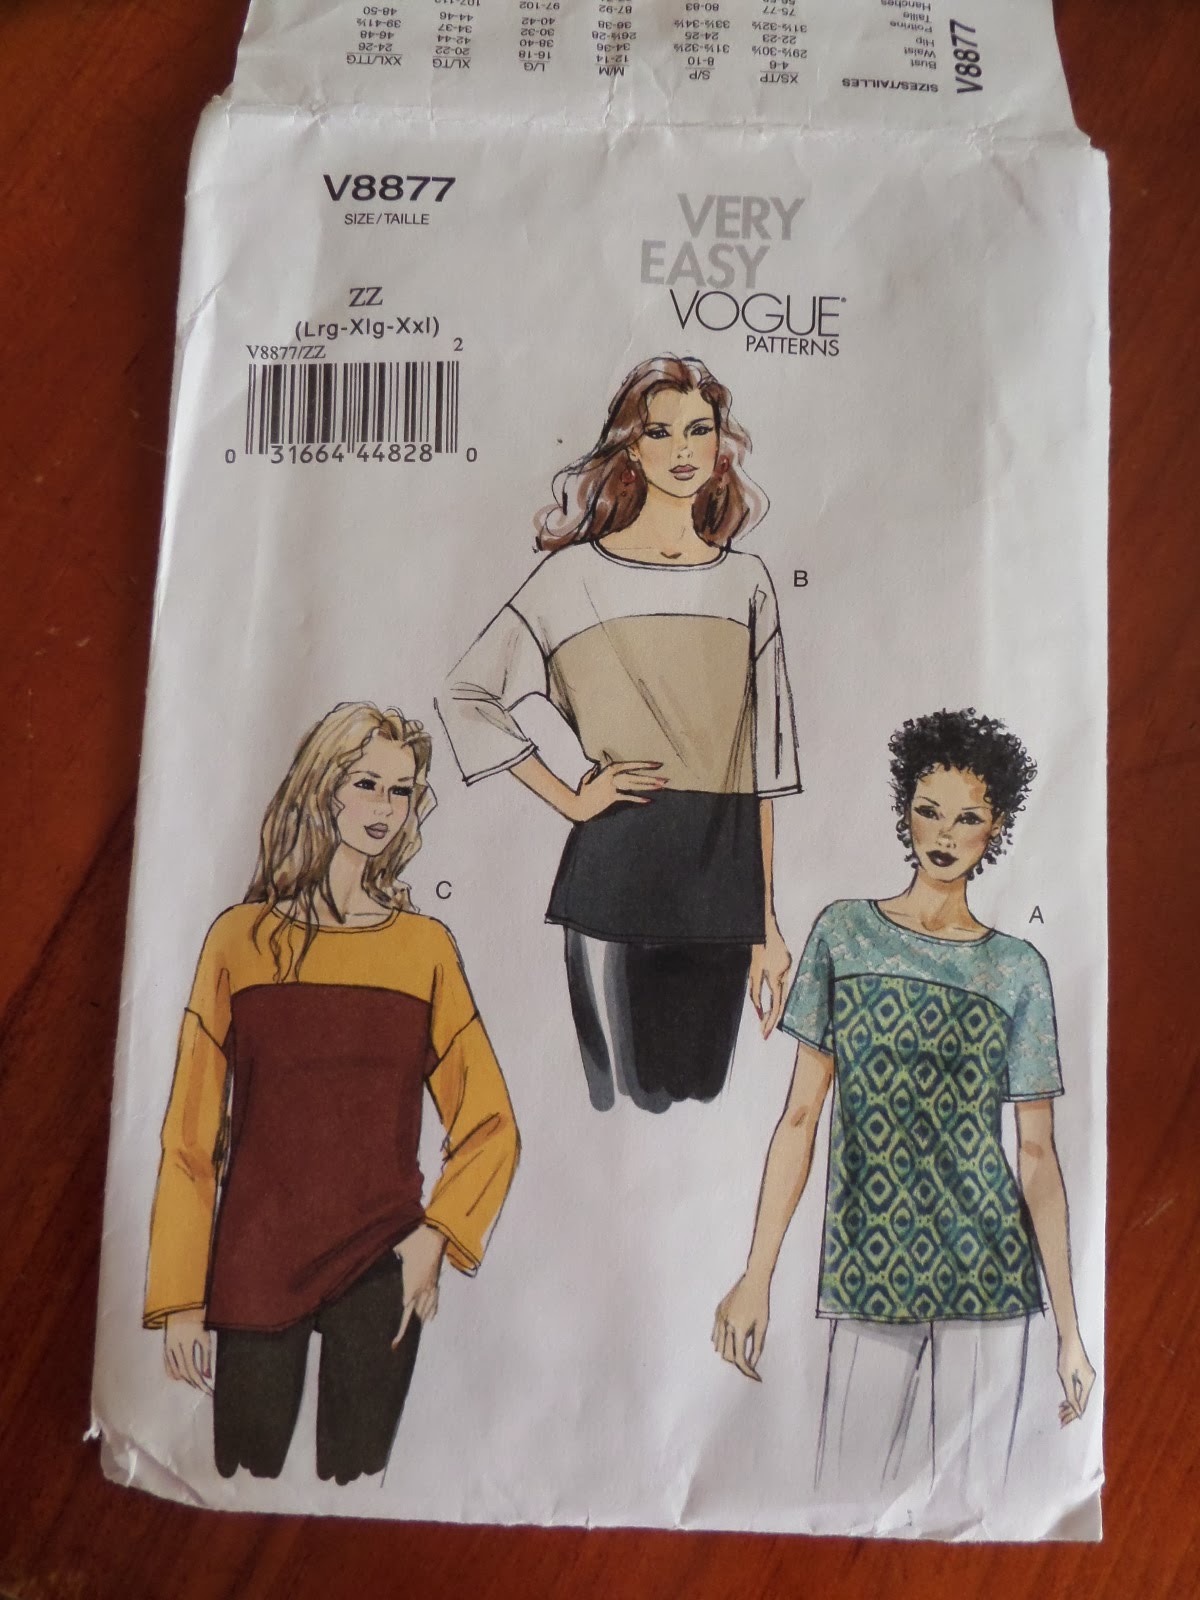
Of course I still have to pack everything, so while I'm procrastinating here's a pic of one of the pattern's I'm contemplating taking:

View A is the whole reason I brought this one, I've seen a fair bit of this style in RTW clothes recently. View B is a bit ho-hum in comparison (I think you really need the lace) and view C just reminds me of a men's t-shirt, not much to home about with that one.

After my last sewing weekend away I realised I packed far too much in the way of projects and fabric options. This time I'll try to stick to maybe one or two (at most) - much less stuff to haul around and realistically what I can hope to complete!  

Expect to be inundated with pics of happy (sewing) campers and the picturesque environs of Moondyne after my return... ;)

Happy sewing everyone!

Kate :)