Pages

Showing posts with label easy sewing. Show all posts

Wednesday, September 17, 2014

Grey Sorbetto

This is my second Sobetto (by Colette patterns) make but my first time blogging it. The previous make was so "not me" that I could not honestly happily post about it. 
This time turned out much better: 
https://blogger.googleusercontent.com/img/b/R29vZ2xl/AVvXsEi9lfpg8BrbNE2lTLVFT6ARDDW4SINM8JhYPHQY64IkVuoQI_X2f5zL1B6Y2zJyrU08n6ZrCAxI2cHvvK0oSG5fTvYCXLlMxAjjGApMdyN4R9IH5ZcvGfZzjI1qk-cb-GXcWfR22-FxbDc/s1600/SAM_1131-738516.JPG
The first Sorbetto top I made was done by selecting the size that corresponded to my measurements. First make was a little "blousey".
Next time I decided to go next size down. Much better fit, maybe could do with a little more room as the side seam does curve quite a bit instead of being straight:
https://blogger.googleusercontent.com/img/b/R29vZ2xl/AVvXsEhKsbz8Za_HQSxIUEaPiD9izX0HlMpyMMwlgUC764PvR55iawWWcrh_dXyxUzHbloOAPu-J9PFhYhMjYHhmllcPGGE2U2vVF340eE_1xOlMs3APaUuTt6jwB3VjahSJy_cBz2R2hIESP1M/s1600/SAM_1129-717893.JPG
 Oh well just more tweaking for future versions! 
A few individual things I did on this top...
Added my own "handmade" clothing label:
https://blogger.googleusercontent.com/img/b/R29vZ2xl/AVvXsEg_vZMI7eeN0U5_mTyaXqhUjGwbZ25Bs1ajPGuArnRQSIxgOUOPKmAdGp-lb3U4rHcSqiOHXKVF2SkFqV4QX2EPQUFORsys-sz9w5Pirow46UEZjQA4Z_-KACnPB6j42zFGmVQWAYan3lg/s1600/SAM_1115-795796.JPG
Embellished the neckline using the "feather stitch" option on my machine:
https://blogger.googleusercontent.com/img/b/R29vZ2xl/AVvXsEjQ-9FyOtVggzrfjbpVYGkMu_hbwb2J0Qgy0wdAVhTPjZZLMVFVpIZ5q57PRMl023vi7u-97e3Es3lF4eyf4LbLikUW3P42gjMreMfDimwi46VNpiSv2jSUWksRUPDtS29UVpAe1Tc497c/s1600/SAM_1102-757329.JPG
Finished the hem by using a zigzag scallop stitch and then trimming near the stitching:
https://blogger.googleusercontent.com/img/b/R29vZ2xl/AVvXsEi4EmFwVcckdYR9Gg_5xp_KqkT9eoJFfQm8_iJeLlXvowSZNr9b3UlJoB4CRAohT24FOQ8NSHU9LACa-SScUM24B7PExs5nywifXFg2hUdMUaJFTGvnU9xfoFJSiX2LXQzECeM6IUvp1H4/s1600/SAM_1114-768801.JPG
Persisted with sewing up this top after realising my tension was totally wrong and being reassured by a fellow sewer that the stitching would not come apart (good thread!):
https://blogger.googleusercontent.com/img/b/R29vZ2xl/AVvXsEiG-XCmzaSJ0uZUXFQlIeSzhxMJZaVpA3nblvYIAau3FaaFbEqjYv5JXFcpL8m0bth5WCsgeUNdCY_uWu_aGpFUywGN5N5q2G0Y_pETRgwXi7XS7zEju68TDomfXDas8e1xHYIHBsO6Ssk/s1600/SAM_1113-770683.JPG
For such a simple top this has been quite a learning curve! Am looking forward to the day that I can make one of these up with minimal thought!

You can find the [FREE] pattern here.

Happy Sewing!

Kate :)

Friday, January 24, 2014

Gearing up for school


The kidlets are off to school this year, a pretty big moment in any family.
 I'm really excited about them going into this new environment, their teacher seems great and we have heard great things about the school . However part of me feels a bit sad about it too at the same time. My babies aren't babies anymore *sigh*- they have entered "schoolkid" territory.
So in order to assuage my mixed feelings I've decided to try and make some of the required items for school. Being Kindy year the list was very brief, but I was able to find two items I could make: the library bag and hats.

Now working in a school library you think for the life of me I would be able to whip up a library bag pretty quickly! But for some reason my brain just froze on suitable dimension and design. 
I felt that as this was their first ever library bag then it had to be pretty special right? 
It had to be in a fabric they liked and big enough that it could fit a really big picture book in it -as Cooper likes BIG books- but not soo big that it swamped my daughter when she tried to carry books in.....

After searching the web for a suitable tutorial I found this one here by Nicole Mallalieu @ You Sew Girl. 
The instructions were really straightforward and in no time at all I had two bags made:
https://blogger.googleusercontent.com/img/b/R29vZ2xl/AVvXsEjelxpFEsA0Rc266Oynd38fCR867g6rp1kL3J923ktzOAivwafjzp6JsT67-wPqLbOiO3QIq6Px2E_9ZyKnTeg4ymyHEpgqdxkG2xXZDnPLpEcja2gyvalBgX6uPxmnydfL6932HBPuUCw/s1600/SAM_0501-744590.JPG
A fairytale princess print for Millie.


https://blogger.googleusercontent.com/img/b/R29vZ2xl/AVvXsEijNHhoCMhgoO3I-yJb4MUy4BoIiAQnytsNyuqn_jOUTQkpNyaDflIDvk4wE9rr8cUohPBZ8FAzb67kAUcBNkbvNRY8A_p0ctjyOUzXhy_WikMYY4wp-0D1fEeOXjRC1X4MM7tntdBaevE/s1600/SAM_0500-733793.JPG
Car/cityscape print for Cooper.


I lined the bags with curtain blockout to give them a degree of waterproofing. This does make it a bit hard to scrunch the fabric up at the top when you pull the drawstings, but I'm hoping once they been used/sat on/thrown around a few time the fabric will soften up.

As of today the hats are still to be made. I've printed out the pattern: the much popular free Oliver + S reversible bucket hat pattern. Besides the "freebie pattern" factor I liked this one as it's unisex (great when you have boy/girl twins), has a decently wide brim and the reversibility means I get to play with two different fabrics for each one - yay me!  

Now all I have to do is get a spare moment to stick those pattern sheets together.....

Happy Sewing :)

Kate x

Sunday, November 3, 2013

White Seafarer tops for summer (Part 2)

  As promised here is the second Seafarer (pattern by Sew Much Ado) top that I made in preparation for summer:


 To tell the truth I thought this fabric was going to be an absolute nightmare to sew. 
I could already see in my mind the foot of the sewing machine catching in the holey over layer, or the under layer getting pulled down into the throat plate and being chewed up by the feed dogs. 
All this before the fabric had even been cut into or pinned.
 After the issues of the last white top I was totally expecting sewing  disaster (such a pessimist Kate!).

Luckily all my fears were very unfounded.  
This fabric behaved beautifully, it sewed like a dream and I had my second top whipped up in no time :D 
The fabric is actually made up of two layers of fine synthetic knit mesh fabric- a plain under layer and the holey/lacey over layer. It is a stretch fabric but has much less give than say a lycra or jersey and that actually works well with the pattern I used.
I left out the pocket feature as I think it would have been OTT teamed with such a textured fabric.

Both this fabric and the one for my previous white top were purchased from the Janome store in Balcatta. They have a fabric section at the back which has clearance Knitwit stock -always worth a look if you are in the area ;)

Happy Sewing!

Kate :)

Thursday, October 24, 2013

White Seafarer tops for summer (Part 1)

The weather is finally starting to warm up (only last week we had the wood fire going) and with 40 degree summer heat looming around the corner I've started thinking of suitable clothing. 
My plan this year is to make a few quick to sew/easy to wear items from pattern's I've already tried before, then if time permits I'll move onto something new...
This week I managed to make two tops from Sew Much Ado's Seafarer top pattern (which I tested here last June). 
I've said it before -I LOVE this pattern- it sews up super quick (2 pieces only if you choose) and is a great casual all rounder piece to wear, figure flattering and easy to throw on with jeans or a skirt. IMHO you can't go wrong.

That is unless - like me- you mistake super fine ribbing for cotton Lycra, then hold on for the ride (and keep the unpicker handy)!

The fabric for this top below IS super fine cotton ribbing: 

 
Superfine ribbing is GREAT for cuffs, necklines and fold over waistbands, it stretches and curves beautifully. 
It's also an absolute *biatch* to sew without an overlocker. Seams stretch and wave like crazy- even when using the stretch stitch option (lightning stitch) on the sewing machine. 

Originally I planned to just make this using the basic front/back 2 piece basic pattern. After ripping out the sleeve ends twice due to waviness (I used a triple zig zag stitch in conjunction with"Steam-a-seam lite" tape) I decided that the only way to stop them looking like wings was to overlock armbands on as a sleeve finish. I then overlocked  bands to the neckline and bottom hem as well, in an effort to try and salvage the top. 
Even using an overlocker the seams still wanted to stretch so I changed the differential feed setting from 1 to 2.2, after consulting the user manual. 

Due to the fabric thickness this top feels more like a sweatshirt than a t-shirt (my daughter said "mummy jumper **?" when she saw it) and it looks quite "made by nanna circa 1980's". NOT that there's anything wrong with that- it's just not the look for me (when I was five years old maybe...)
 Safe to say it has now been put in the house/lounge/PJ wear drawer, I feel like a marshmallow in it so it wont be leaving the house!

How did I manage to make such a fabric blunder? Largely trying to choose and  buy fabric in a hurry- combining fabric shopping with family outings has never really turned out well in my experience.

Also -up until now- I had never had anything to do with this type of fabric. It wasn't until I was sewing it, trying to work out why it stretched like crazy, did I happen to pull it the right way and see that it was in fact ribbing! 

Bit of a light bulb moment there ;)

Guess that explains why it seemed to be a fabric narrower than usual in width (I ended up having to put a centre seam in the back fabric piece). 

Anyway I think I've waffled on enough for one post so I'll leave the top that actually DID work out until next time!

Until then ...


Happy (hopefully trouble-free) sewing!

Kate :) 

P.S in case you are wondering where you can get this type of ribbing from- I brought this fabric from Janome Balcatta.


** We tend to call sweaters/pullovers "jumpers" here but I know "jumpers" refer to a different type of garment elsewhere in the world.


Tuesday, June 25, 2013

Seafarer Tops

A while back I gave a sneak peek (and here too) of something I was pattern testing for Sew Much Ado. This pattern has since been released as the "Seafarer top" , basically it's a knit dolmain-style tee with a woven fabric pocket. Very cute...and a easy as anything to sew!!! I think this would make a great first project OR if (like me) you are looking for something quick and easy to sew, well this is your pattern! 
Normally I add at least 10 -15cm to any pattern but for this one it was not necessary!!! I did add the extra for the garments pictured but really it was not necessary- the tops could have happily done without (strategic bunching of fabric used in places). Of course if you are short waisted you might need to alter the pattern but this is the first time EVER I have not needed to change the length to fit me sooo sorry one happy camper here! 
Ok so enough yakking and on to the pics...

Large deco floral print in front of mulberry (neighbour's plant coming over fence) bush

Front on in different light


On a hanger (my preference over actually modelling BUT it probably doesn't give you as much technical information right?)

Flat- see the simple design :)

Shiny metallic woven pocket. LOVE this detail.

Number two version- made with an Italian knit bought from Janome Balcatta. Pocket recycled from a silk/cotton blend Portman's top.

...another view...

...and I added this one cos I think my neck looks better here- oh vanity!!!
So the floral top was just turned and twin needle stitched hems but for the grey cherry blossum print I actually used the arm bands options. I think in a slightly heavier knit the option with arm bands would make a great inter-seasonal (or Perth weather) garment.

This is a little GEM of a pattern, don't be fooled by the simplicity of the style- this will be something you want to wear day in and day out. 

So everyone...

Happy Sewing :) :) xx

Kate x

Wednesday, June 19, 2013

Staple dress is DONE!

So I finally got around to hemming my Staple dress (April Rhodes patterns) that I started on Sewing Weekend Away:

 There was much swearing and several glasses of wine as my machine seemed hell bent on sucking much of the fabric into the feed plate, but after a good nights sleep - and some reflection- we all got there.... more or less with sanity intact ;)
 I must admit after first assembling this dress - before the shirring - I did think OMG what a SACK! But row by row (16 rows in all) I finally cinched it in enough so that the dress now has some "shape" and shows of what little (post-kids) waist I still have.
Side view showing corset like shirring panel around waist. And yeah I'm thinking that the bra I'm wearing makes my chest look a bit weird too...Also is that a sway back alteration I'm needing???  

I managed to find a belt in my wardrobe that , while not the perfect colour, is a pretty good shape for this style of dress (at least on me). I think future dresses may be planned to tie in with this belt.... 

With belt.
Without belt.
All up I'm pretty happy with this dress pattern. The shirring was a new thing for me to try out but not as scary as I thought it would be. 
The high-low hem is a nice deviation from what I normally make/wear and surprisingly even though the neckline is not low cut I still don't feel like my boobs are the main feature when wearing this! 

The fabric used to make this dress is a vintage John Kaldor fabric that I picked up in a op-shop for a few dollars. I had no idea at the time of buying that John was such a big textile designer both in the Uk and Australia, maybe if I'd know I might have been a bit more careful with the cutting! Who am I kidding? I would have probably NEVER had cut into this had I know, so maybe its just as well...
As far as the fabric goes: make-up is pretty much 210% synthetic (the wrong side sparkles!) plus it has a slight stretch to it, two factors which I think when combined together helped make this murder to hem. The drape however is lovely and the textile design fairly timeless (I've already had a pretty "trendy" friend compliment me on the design). I figured the un-natural fibres would work OK in my wardrobe as long as I didn't the dress in the heat of summer or try to iron it...or near an open flame.
I added my usual 10-15 cm to length and unfortunately did not think about pocket placement post lengthening enough to make them practicable. My pocket got hacked out as they ended up being in the knee region, not a good look on anyone I think!

This dress has already had a short outing in public, while in mummy capacity, and fared well (dare I say) for something I slapped together made myself;)
More pics to follow.

'Til then...

Happy Sewing!

Kate x

Sunday, October 28, 2012

Simplicity 4076 top

I have been laid up recovering from minor surgery so here's a top I finished a few weeks ago :

Simplicity 4076 view D with view B sleeve option
My wardrobe has a lack of comfy-yet-not-mumsy/daggy casual tops and this pattern appears to have ticked all the right boxes. The fabric is a synthetic stretch (jersey?) from Janome in Balcatta. They have a large clearance area at the back and I know that anything I buy from there will be good quality as it is ex Knitwit stock. I loved the abstract print and brought it with view D in mind. The sleeves are from view B.


View B sleeves- accidently lettuce leaf finished but it turn out OK I think.

When I make this again I will probably look at scooping out the side seams at the bust area or doing a proper FBA to accommodate "the girls", as the fabric strains across the bust and loses the gathering detail once I put it on. 

Gathering detail
Lack of gathering detail- gathers now turned into wrinkles pointing to boobs eek!
I would do a FBA rather than go up a size as I am happy with the fit through the shoulders and waist. 

I had a fair idea my bust might distort the pattern but was too impatient to get something made up! Live and learn...next time I will make adjustments to the pattern first to rectify the problem.
Otherwise I am pretty happy with this top and have worn it quite a few times in casual outfits, once I fix the bust I can see it becoming a wardrobe staple for me.

Saturday, October 13, 2012

More Simplicity 5537 for Cooper


Here are a few pictures of the other shorts that I made from the Simplicity pattern for Cooper. As I was trying to knock these out pretty quick I decided to use my new Ikea pinking shears to finish the seams, with mixed results. Some fabrics behaved better than others when it came it not fraying after being pinked. All the shorts pictured have been worn and washed once only.

Camouflage print shorts
  
As the fabric was quite tightly woven they didn't fray too badly but I still decided to reinforce and zigzag the seams, as I think I trimmed the crotch seam a bit too heavily.

Skull and crossbone print AKA "Pirate " shorts
Fraying not too bad on side seam, just again had trimmed the crotch a bit too much.

Dino shorts-have now realized fabric is Chambray NOT denim :( 


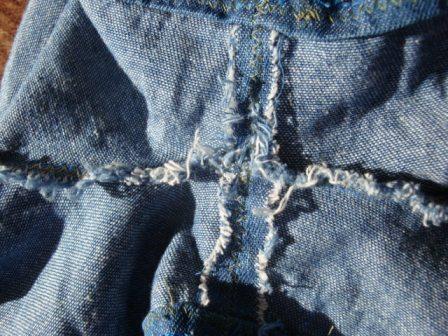
Quite loosely woven and hence frayed like heck!
Even zigzagged over the side seams as I did not trust this not to fray more.
A cheap iron-on dinosaur decal I added. Has started to ball already so in future will look for FULLY WOVEN/ EMBROIDERED decals, NOT ones that use cheap felt for most of the colouring.


Friday, October 12, 2012

Shorts finished


 Here's a few photo's of Cooper in one pair of  the Simplicity 5537 shorts I made him.
 I must say the elephant print went down a real treat :
Oooooh whats that on the telly?

Posing and watching....

Ok mum over it now...are you finished?


Please excuse the shoddy phone pics - a 2.5 yr old sick toddler is hard enough to get a decent picture of at the best of times!
These shorts were extremly easy to put together - I will try to write up a review on sewing.patternreview.com soon :)